
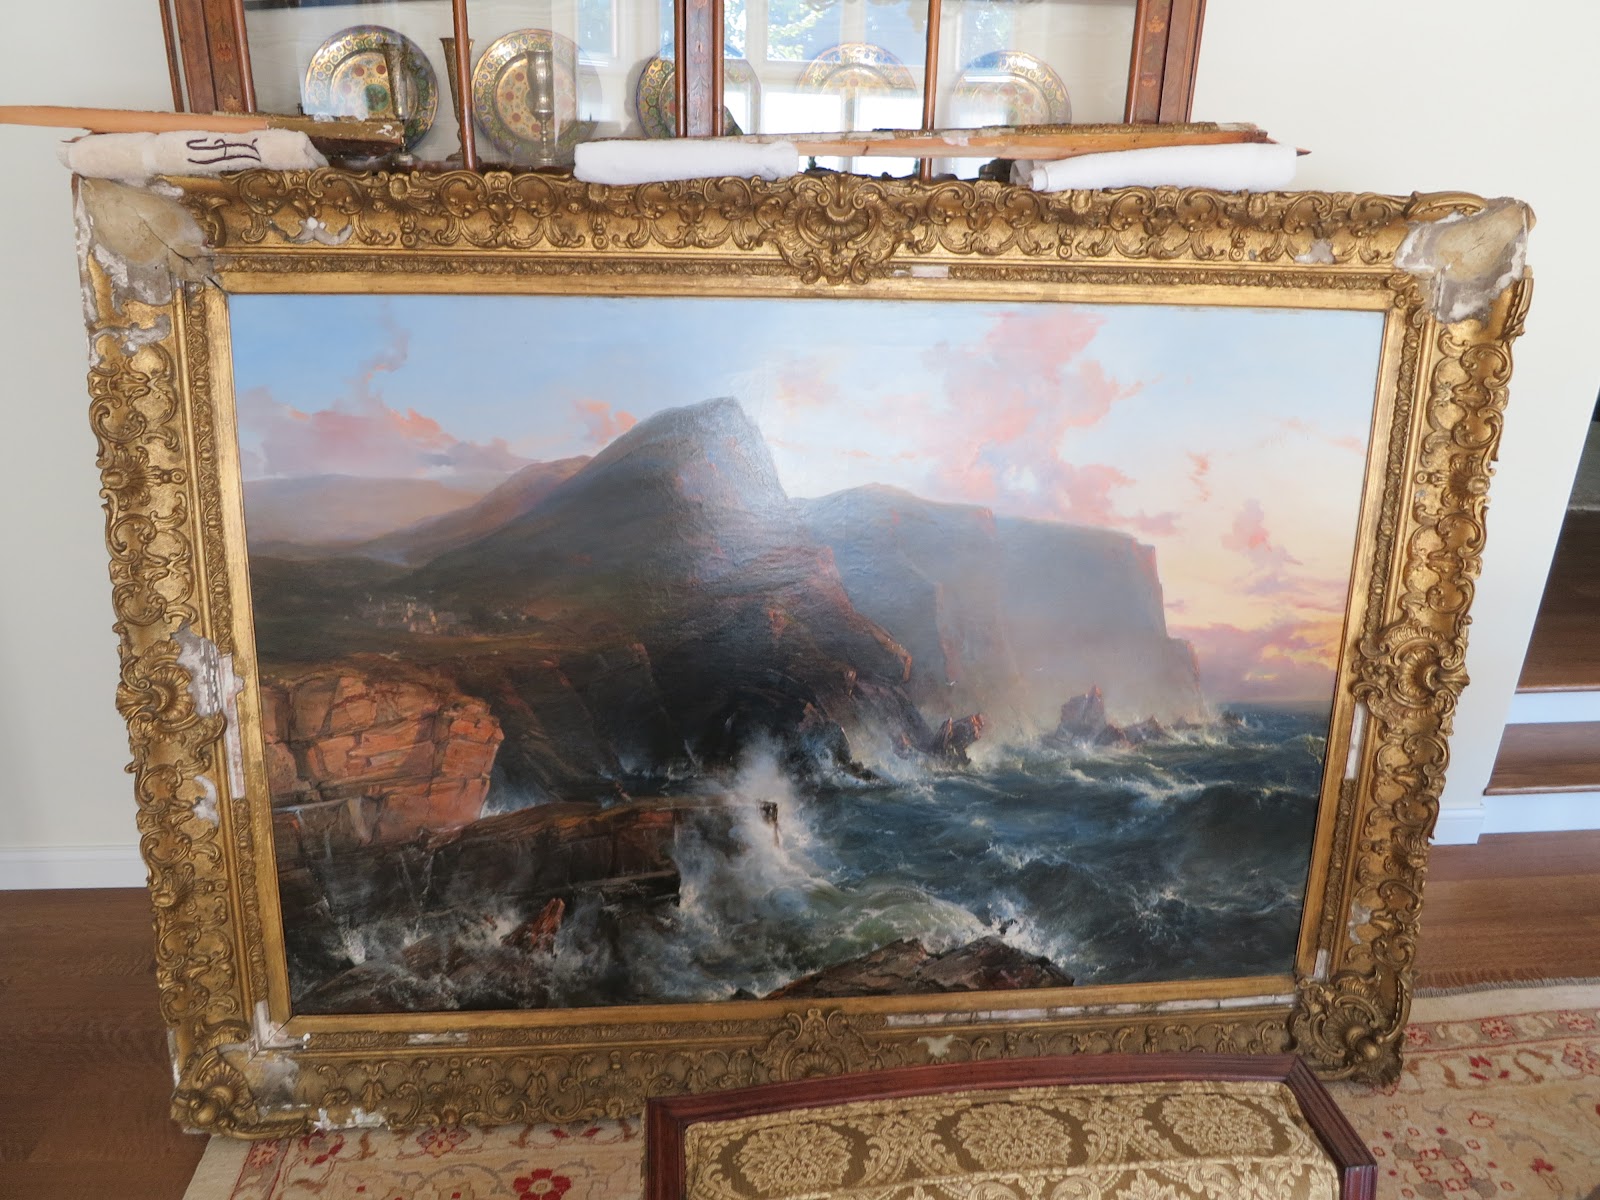
 One of the largest and most involved frame restorations we have worked on to date was a 7 ft. by 5 ft. ornate frame. The piece had fallen off the wall and down a flight of stairs. This was an instance where the frame had been fit with inappropriate hanging hardware for it's size and weight. Because of the impact, we ended up with hundreds of individual pieces that had fallen off the face of the frame, as well as parts of the large decorative corner pieces. Luckily, the painting itself was not harmed during this accident.
 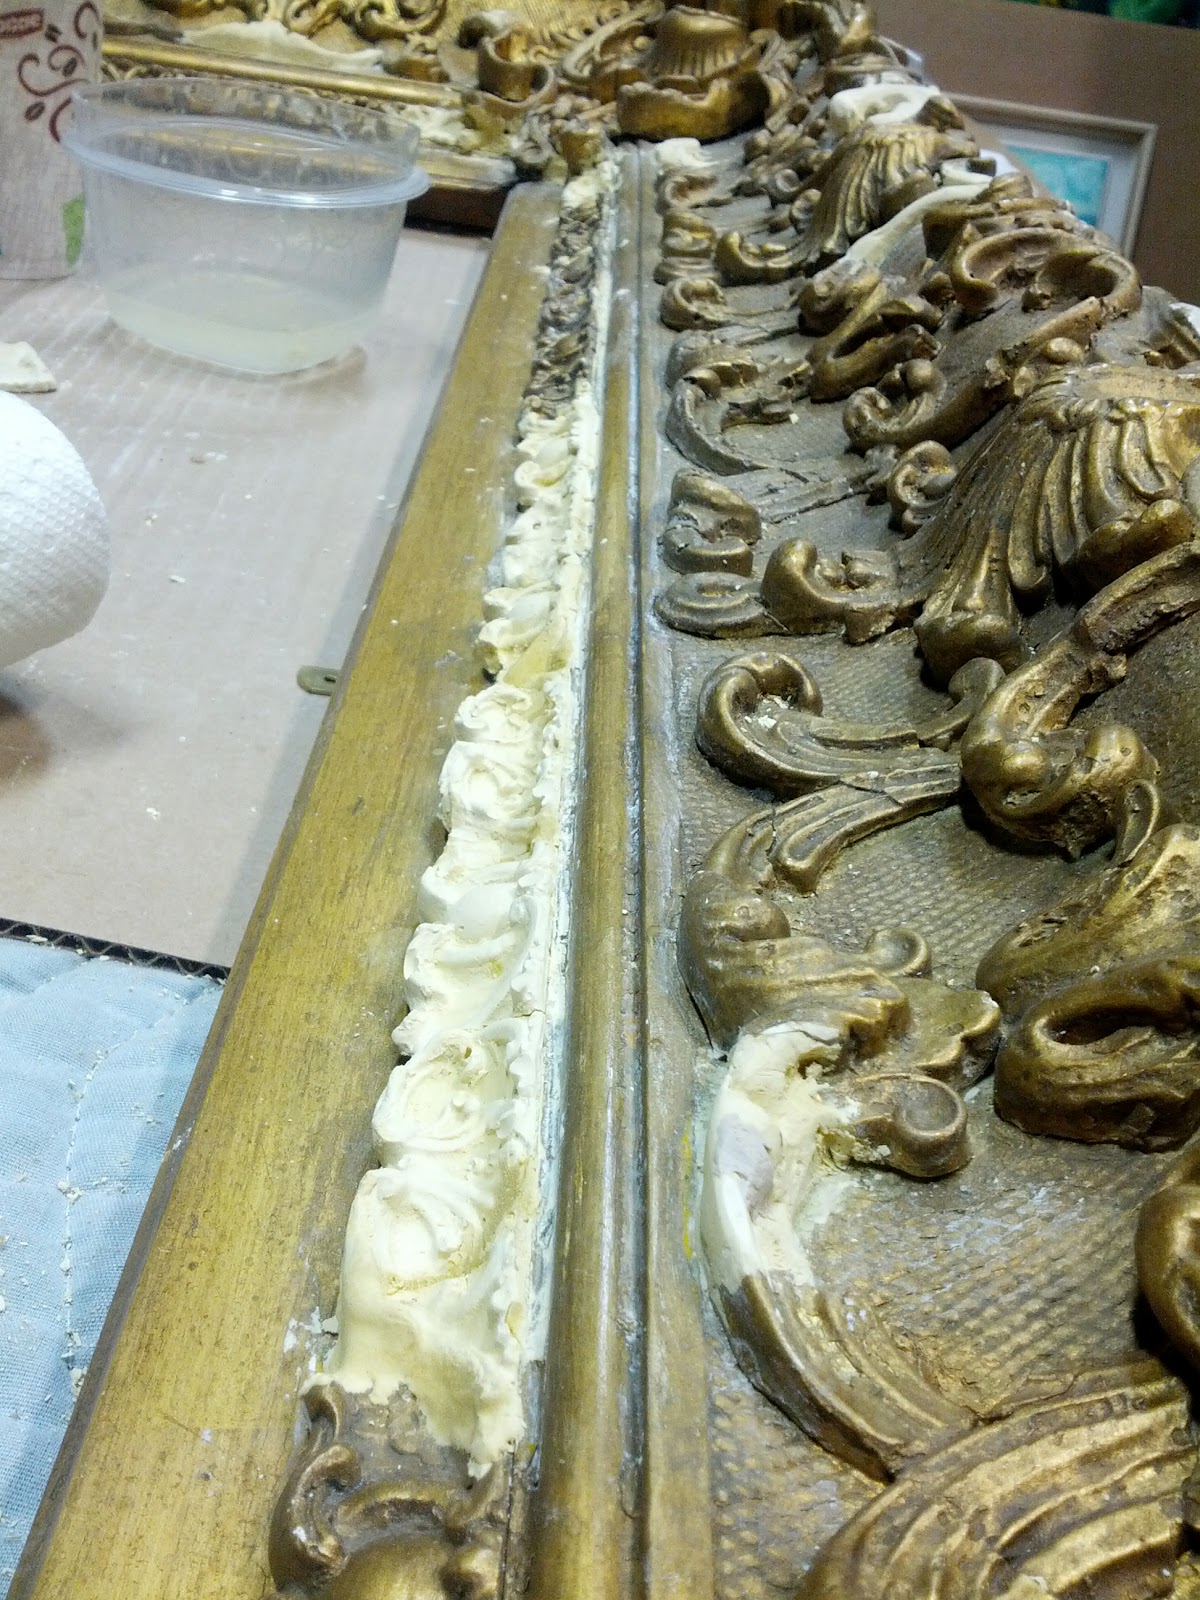 We began the treatment by re-gluing and stabilizing the corners so that they were ready to be put back together. Although we were able to puzzle in and adhere most of the pieces, there were still a significant amount of smaller pieces that needed to be re-made. All four corners were affected to a degree - some worse than others. Luckily a few of the larger pieces could be salvaged. On top of re-making some of the smaller pieces, the larger pieces were the biggest under taking.
For many small repairs we can sometimes use an oil based polymer clay to make a mold, but this would not be sufficient for such a large repair. In this case, we needed to go one step further and make re-usable silicone molds. Before the mold can be taken, we had to re-make one of the corners so that we could have an accurate shape to replicate.
 |
| Newly shaped and fitted plaster corner |
Making a rubber mold is a more complicated process than taking a clay mold. The mold has 2 parts – silicone and a setting agent. The 2 parts are mixed together and immediately poured and left to set. The finished corner is prepped by creating a buffer to keep the material contained around the shape, as well as sprayed with a quick release spray so the mold, once set, could be easily removed. After every corner and shape was adhered and refined with carving tools, we could start getting the new pieces ready to patina.
 |
| Corner after bole is applied |
Of course, to make sure the piece was secure, we fixed the back with a french cleat, instead of the two small screw eyes it had originally been installed with. Although very laborious, this was a fun project to see through to the end. After installing the piece back in the client's home we felt assured it would stay put for many years to come!
 |
| Completed frame hung up post-restoration |
No comments:
Post a Comment